Hey there, creative souls! If you’re dreaming of bringing a children’s book to life with your illustrations, you’ve landed in the right spot. Whether you’re an aspiring illustrator or already a professional artist, illustrating a children’s book is a journey of discovery. Discovery of what you can draw (at least for me it has been) and how the art deepens the story. So, grab your sketchbook (or tablet), and let’s dive into the colorful world of children’s book illustration.
Step 1: Find Your Inspiration
Every great illustration begins with a spark of inspiration. Ask yourself: What excites you about the story? Is it the whimsical characters, the vivid settings, or the journey itself? Delve deep into the story’s heart and let your imagination run wild. Make sure to do your homework and study published children’s books for inspiration—especially the Caldecott winners. Those books that have won the award specifically because of the art. Make sure you know why WHERE THE WILD THINGS ARE is spectacularly unique. (For example, you are aware how the art grows, like the jungle, until it takes over the entire spread… right?)
Step 2: Define Your Style
Your illustration style is like your fingerprint—unique and distinctly yours. Do you prefer a cartoony, playful style or a more realistic approach? It depends on the text, of course. Editors have a talent to match text with just the right illustrations. That’s why I prefer publishing with traditional houses.
Maybe you love using bold colors, or perhaps pastel hues are more your vibe, but whatever your style, remember the illustration’s first responsibility is to expand the impact and value of the story. The pictures can also change the story in a way that is in service to the reader, meaning, expanding their viewpoint, or revealing something not including in the text. Personally, my first thought is not to consider what will resonate with the target audience, but I do think about what will complement the story’s tone. Remember, consistency is key, so keep your style uniform throughout the book. Your characters must look like the same character on page two as on page thirty-two
Step 3: Storyboarding
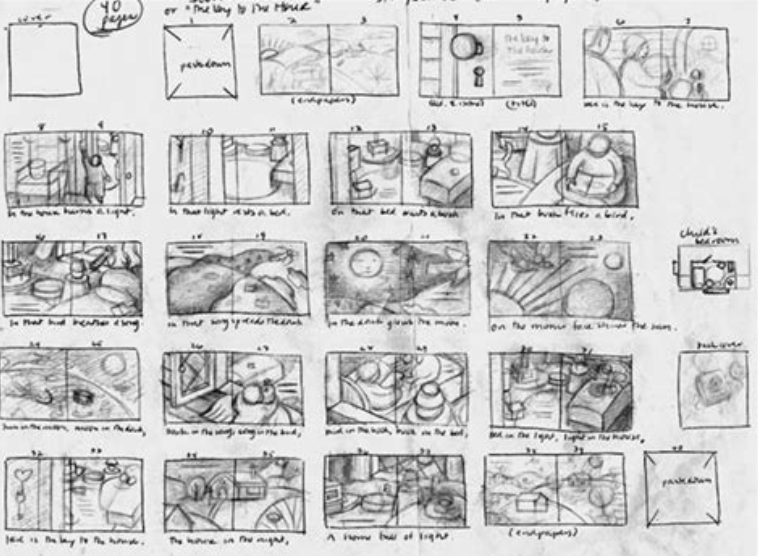
You’ll need to create a storyboard. Let me rephrase that. You’ll want to create a storyboard. Think of this as your visual blueprint. Sketch out a rough plan for each page or scene. This doesn’t need to be detailed—stick figures and scribbles are perfectly fine at this stage. Your storyboard will help you arrange the flow of the narrative and ensure that each illustration contributes to the story. You can also be thinking of the drama of the page turn when it’s in a tiny sketch, and not feel too married to it. I’m a big fan of Carter Higgins’ books. Here is a sketch from her site which you can find here.

Step 4: Character Design
Characters are the heart of any children’s book. Spend some time creating character sheets to explore how your characters look from different angles and express various emotions. Consider giving them unique traits or accessories that make them memorable. Whether you’re working on anthropomorphic animals, a balance between animal and human features, or lifelike kids, remember to add charm and relatability.
Step 5: Choose Your Tools
Technology provides illustrators with a smorgasbord of tools. Programs like Procreate, Adobe Illustrator, or Canva can help bring your digital illustrations to life. If you prefer the traditional route, watercolors, colored pencils, and ink are timeless favorites. Mix and match digital and traditional methods if you like—hybrid techniques can produce stunning results. I have learned a ton about drawing with Procreate from Lisa Bardot, so check her out!
Step 6: Feedback and Revisions
Feedback is an artist’s (or a writer’s) best friend. Show your work to trusted peers and fellow illustrators to gather insights. Constructive criticism will help you refine your illustrations and spot areas that need a tweak. Remember, art is subjective, so pick and choose the feedback that aligns with your vision. And don’t take anything personally. It’s good to grow a thick skin.
Step 8: Final Touches
Put your manuscript and your dummy away for a while. I usually recommend at least a month. You’ll need some distance to gain perspective. Take a step back and look at your work with fresh eyes. Don’t be in a hurry! And remember to have fun with the process.


